Post by Blind on Feb 17, 2009 21:54:49 GMT -5
Welcome to my plastic tutorial. I have added a fair bit of detail to this so instead of making the tutorial a large image i have decided to type it up and add images, simply because i don't want to limit the amount of people to see this. Slower internet connections wont have to wait as long for this too load 
Once again please do not copy this and post it anywhere else claiming as you own.
This tutorial is made in such a way that you can select from 2 different results of plastic at the end.
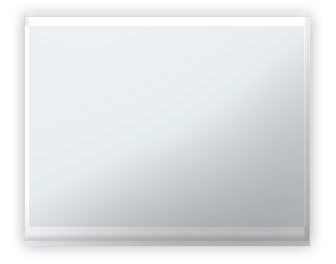
To start off we need to make our base. In this case i am going to use just a box filled with the colour 2d88bb. You can use any colour or shape that you wish, or you can add this style to your existing banner any other image.
I will also just add a white background to this image as it needs to sit on a background so that it can be seen properly.

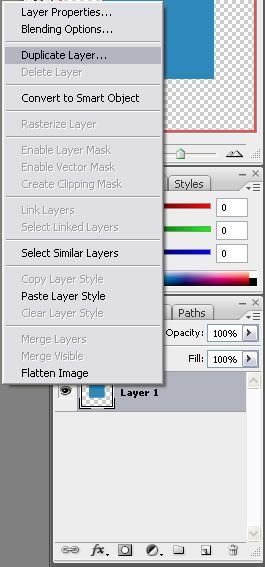
Now before doing anything else we need to duplicate the layer that the box or shape is on so that we have 3 of them. Do this by right clicking on the layer then selecting duplicate from the drop down menu. Do this 2 times so that you now have 3 of the same layer.
Now we want to hide those to duplicated layer, for now. To do this you need to click on the eye next to each of the layers.
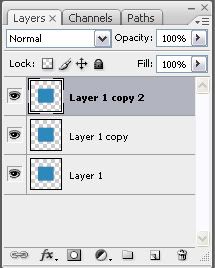
Your layers area should now look like this, with only the original layer visible:

Now we will begin to add the plastic effect. Make sure your original layer is selected.
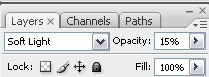
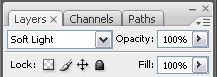
Change the opacity of that layer to 15%
And change the layer to "Soft Light"
Next we want to right click on the layer and select blending options from the drop down menu.
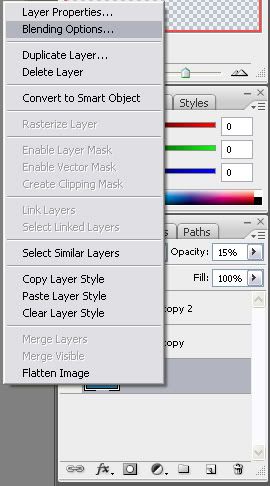
Once you select blending options a window will pop up. Using that window we are going to add an outer glow, bevel and Emboss and Satin effects.
Use the settings i have in these pictures.
Outer Glow:

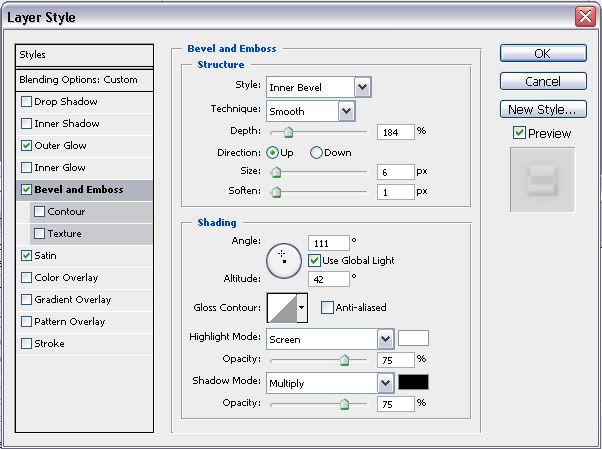
Bevel and Emboss:
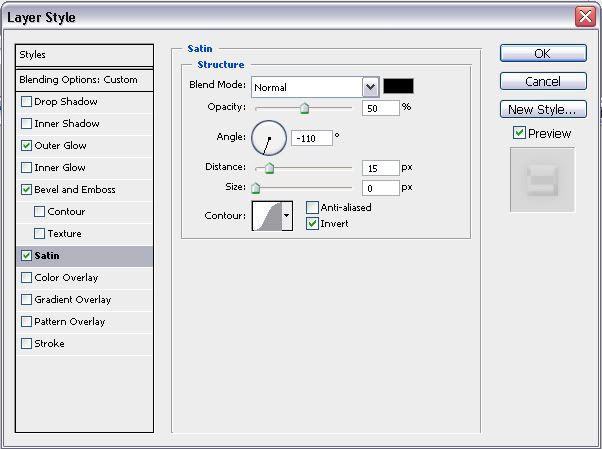
Satin:
You should now have a result similar to this:
Now make the second layer visible by clicking where the eye should be next to the layer. We are now going to add effects to this layer.
Change the opacity of this layer to 50%
And set it to "Overlay"
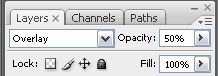
Right click on the layer and select blending options so the layer blending window pops up which we will use to add an outer glow and bevel and emboss effect to the layer.
Use the settings i have here.
Outer Glow:
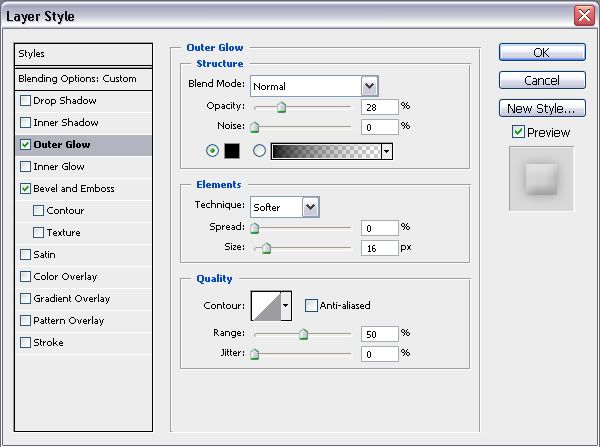
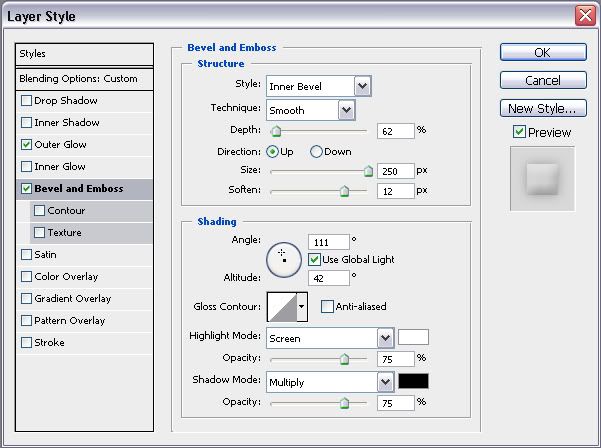
Bevel and Emboss:
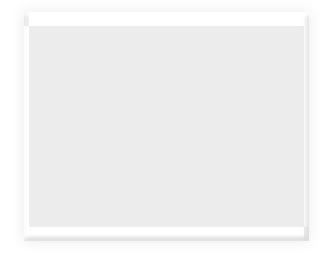
You should now have a result similar to this:
We are nearly finished now. Just need to add effects to our last layer.
So set the last layer to visible by clicking where the eye should be next to the layer.
Leave the opacity at 100%
Change the layer to "Soft Light"
That is pretty much it.... nearly.
You now have the option to select between 2 different plastic looks.
With all three layers visible your plastic will look like this:
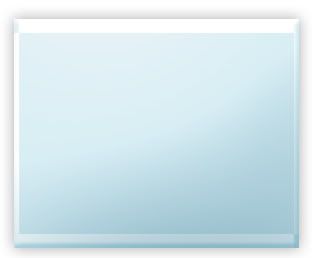
If you want a smoother plastic look all you need to do is hide the original/first layer.
Which will give you this plastic look:

On different coloured backgrounds you may have to play with the settings a little bit to get it too look correct.
Enjoy
Once again please do not copy this and post it anywhere else claiming as you own.
This tutorial is made in such a way that you can select from 2 different results of plastic at the end.
--------------------------------------------------------
To start off we need to make our base. In this case i am going to use just a box filled with the colour 2d88bb. You can use any colour or shape that you wish, or you can add this style to your existing banner any other image.
I will also just add a white background to this image as it needs to sit on a background so that it can be seen properly.
Now before doing anything else we need to duplicate the layer that the box or shape is on so that we have 3 of them. Do this by right clicking on the layer then selecting duplicate from the drop down menu. Do this 2 times so that you now have 3 of the same layer.
Now we want to hide those to duplicated layer, for now. To do this you need to click on the eye next to each of the layers.
Your layers area should now look like this, with only the original layer visible:
Now we will begin to add the plastic effect. Make sure your original layer is selected.
Change the opacity of that layer to 15%
And change the layer to "Soft Light"
Next we want to right click on the layer and select blending options from the drop down menu.
Once you select blending options a window will pop up. Using that window we are going to add an outer glow, bevel and Emboss and Satin effects.
Use the settings i have in these pictures.
Outer Glow:
Bevel and Emboss:
Satin:
You should now have a result similar to this:
Now make the second layer visible by clicking where the eye should be next to the layer. We are now going to add effects to this layer.
Change the opacity of this layer to 50%
And set it to "Overlay"
Right click on the layer and select blending options so the layer blending window pops up which we will use to add an outer glow and bevel and emboss effect to the layer.
Use the settings i have here.
Outer Glow:
Bevel and Emboss:
You should now have a result similar to this:
We are nearly finished now. Just need to add effects to our last layer.
So set the last layer to visible by clicking where the eye should be next to the layer.
Leave the opacity at 100%
Change the layer to "Soft Light"
That is pretty much it.... nearly.
You now have the option to select between 2 different plastic looks.
With all three layers visible your plastic will look like this:
If you want a smoother plastic look all you need to do is hide the original/first layer.
Which will give you this plastic look:
On different coloured backgrounds you may have to play with the settings a little bit to get it too look correct.
Enjoy